What Does It Mean to Auto-Publish Blog Posts to WordPress?
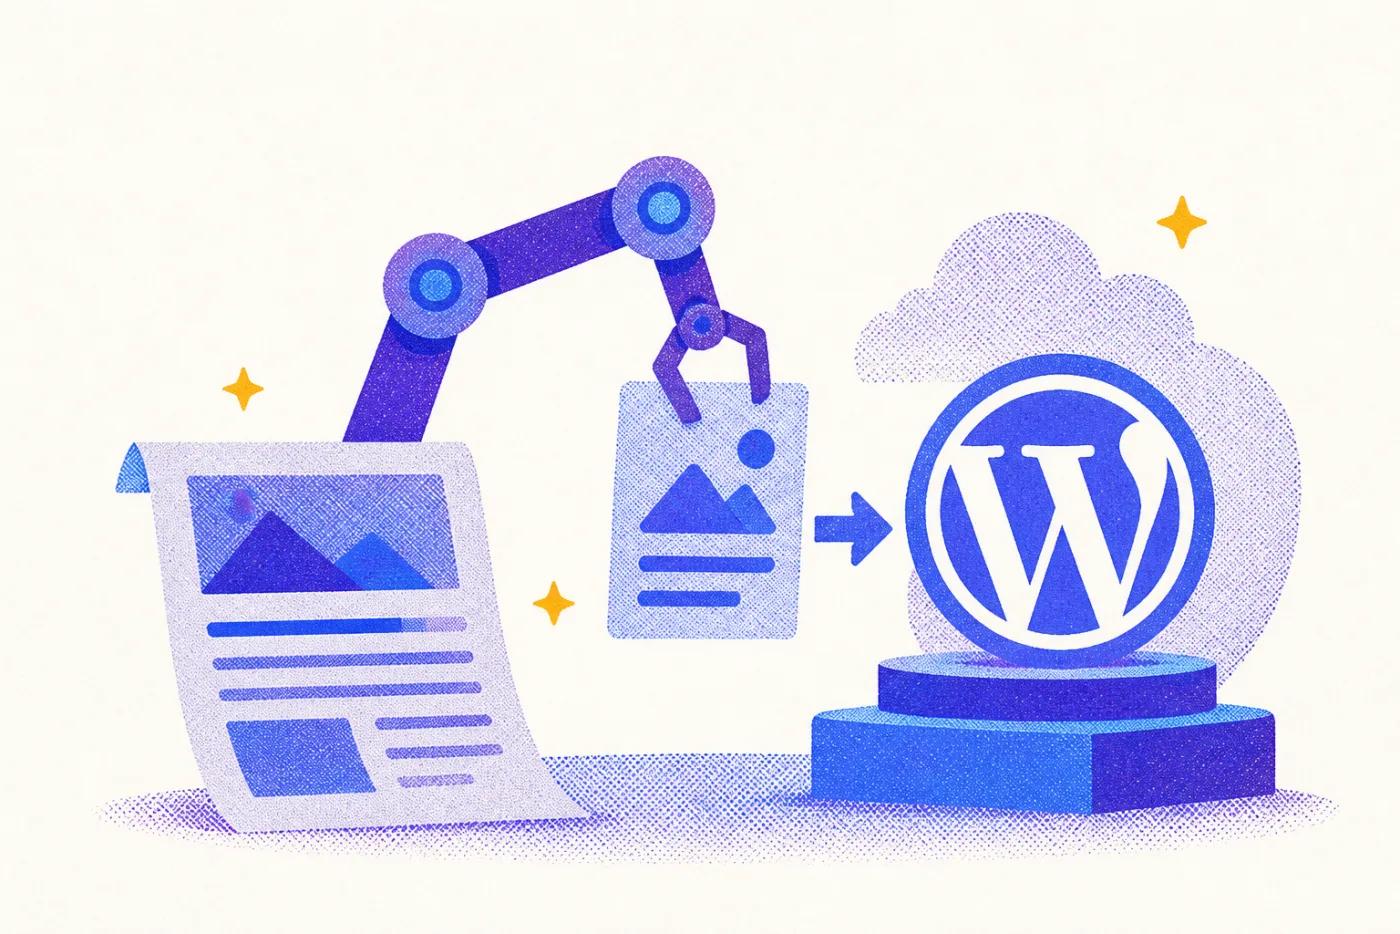
Auto-publishing means WordPress moves a post from draft or scheduled status to "published" without anyone clicking a button. But that single definition covers two very different workflows.
The first is scheduled publishing: you write a post manually, set a future date and time, and WordPress handles the rest. The second is a fully automated pipeline: content is generated, formatted, and pushed to WordPress with no human step in between. Same outcome, very different levels of automation.
HubSpot research shows companies publishing 16+ blog posts per month get 3.5x more traffic than those publishing four or fewer. That cadence is brutal to maintain by hand. Auto-publishing is how lean content teams close that gap without burning out.
WordPress has had scheduling built in since version 2.1 in 2007 and a REST API since version 4.7 in 2016. The infrastructure is already there.
This article covers four methods to use it:
- Native WordPress scheduling (no plugins)
- The WordPress REST API
- Scheduling plugins
- AI content platforms that write and publish automatically
Pick the one that fits your stack and skip straight to it.
Before You Start: Prerequisites and Setup Checklist
Skip this checklist and you'll hit a wall halfway through setup. Every method in this guide depends on these five things being in order.
1. WordPress 5.6 or higher Application Passwords are built into WordPress core from version 5.6 onward, so you don't need a separate plugin to authenticate API calls. Check your version under Dashboard > Updates.
2. Permalink structure set to anything except "Plain" Go to Settings > Permalinks and choose Post name, Day and name, or any non-plain option. With Plain permalinks, WordPress can't route `/wp-json/` correctly, and REST API calls will return 404 errors. Save the settings page even if you don't change anything, to flush the rewrite rules.
3. Timezone set correctly Go to Settings > General and confirm the site timezone matches the timezone your team schedules in. A mismatch is the single most common reason posts publish at the wrong time. If your team is in EST and the site is set to UTC, every scheduled post will be off by five hours.
4. SSL certificate active Any external tool connecting to the REST API requires HTTPS. Most hosts include SSL by default in 2026, but confirm your site loads on `https://` before connecting any automation.
5. A dedicated automation user Create a separate WordPress user with Author or Editor rights specifically for API calls. Don't use your main admin account. This limits the damage if credentials are ever exposed.
One shortcut worth knowing: if you're on a managed WordPress host like Kinsta, WP Engine, or Pressable, WP-Cron is typically replaced with a real server cron automatically. That makes native scheduling more reliable out of the box, with no extra configuration on your end.
Method 1: Native WordPress Scheduling (No Plugins Required)
The simplest way to auto-publish blog posts to WordPress costs nothing and takes about two minutes per post.
WordPress has built-in scheduling on every installation. No plugins, no code, no third-party accounts. If you're just getting started with auto-publishing, this is where you begin.
Difficulty: Beginner | Time: ~2 minutes per post
Step 1: Schedule a Post in the Block Editor (Gutenberg)
Most WordPress sites run Gutenberg by default. Here's the exact process:
- Open or create your post in the WordPress editor
- In the top-right corner, click the Publish panel to expand it
- Under "Publish", click the date and time field
- A date and time picker appears. Set your target publish date and time
- Click Schedule (the blue button replaces the Publish button once a future date is set)
The post status changes to "Scheduled" and WordPress queues it for that exact time.
Step 2: Schedule a Post in the Classic Editor
If your site still runs the Classic Editor plugin, the flow is slightly different:
- Open or create your post
- In the Publish meta box (top-right sidebar), find "Publish immediately"
- Click the Edit link next to it
- A date and time picker appears inline. Enter your target date and time
- Click OK, then click Schedule
Same outcome, slightly different path.
The One Catch Worth Knowing
WordPress scheduling runs on WP-Cron, a pseudo-scheduler that only fires when someone visits your site. On low-traffic sites, a post scheduled for 9:00 AM might not go live until the first visitor arrives at 9:47 AM.
For most content teams publishing a few posts a week, this delay is barely noticeable. But if you're running a time-sensitive campaign or publishing at high volume, it's a real problem.
Pros of native scheduling:
- Zero cost, zero setup
- Works on any WordPress installation
- No plugin conflicts or compatibility issues
Cons:
- Manual process, one post at a time
- WP-Cron timing can drift on low-traffic sites
- No bulk scheduling or calendar view
If you're managing a handful of posts per week, native scheduling is all you need. If you're running a content operation at scale, read on.
Step 1: Schedule a Post in the Block Editor (Gutenberg)
Before you touch the date picker, check one thing: Settings > General > Timezone. Get that wrong and your post goes live at 3 AM instead of 9 AM. Once confirmed, follow these steps:
- Open or create a post in the WordPress block editor.
- In the right-hand sidebar, find the Summary panel under the Post tab.
- Click the Immediately link next to "Publish." A date and time picker will appear.
- Select your target future date and time.
- Click Schedule (the button changes from "Publish" to "Schedule" the moment you pick a future date).
- Return to Posts > All Posts and confirm the post shows a Scheduled label with the exact date and time.
If the label reads "Draft" instead, you clicked "Save" rather than "Schedule". Go back and repeat step 5.
As WordPress's official support documentation notes, scheduling always uses your Settings > General timezone, not your browser's local time. Double-check it every time you onboard a new site.
Step 2: Schedule a Post in the Classic Editor
The Classic Editor plugin still runs on a huge number of WordPress sites. The flow differs from Gutenberg, but the end result is identical.
- Open or create a post in the Classic Editor.
- Find the Publish meta box in the top-right column of the edit screen.
- Next to the calendar icon, you'll see "Publish immediately". Click the Edit link beside it.
- A date and time input appears. Enter your desired publish date and time, then click OK.
- Click the blue Schedule button to confirm.
Once scheduled, the post status changes to Scheduled. WordPress publishes it automatically at the time you set, assuming WP-Cron fires correctly.
One thing to watch: the Classic Editor uses your site's timezone setting, not your local machine's. Double-check Settings > General > Timezone before you schedule anything critical.
The WP-Cron Problem: Why Scheduled Posts Sometimes Miss Their Time
Here's the part most WordPress scheduling guides quietly skip: WordPress doesn't use a real server-side cron daemon.
As documented by the WordPress Plugin Handbook, WP-Cron works by checking scheduled tasks stored in the `wp_options` table on every page load. When a task is due, WordPress fires a background HTTP request to `wp-cron.php` to execute it. No page load, no cron check. Simple, and fragile.
The real-world consequence: if nobody visits your site between the scheduled publish time and the next page load, the post won't go live on time. On a low-traffic site, that gap can stretch to hours. You'll see the post stuck with a "Missed schedule" label. As SmartWP puts it, "a scheduled post timed for 9 AM on a Sunday won't publish until the first visitor lands on the site after 9 AM."
Two fixes that actually work:
Fix 1: Install a missed-schedule plugin. The free Missed Scheduled Posts Publisher by WPBeginner checks every 15 minutes and publishes any posts that slipped through. Takes about 60 seconds to set up.
Fix 2: Replace WP-Cron with a real server cron job. Add this line to your `wp-config.php` (above the "stop editing" comment):
`define('DISABLE_WP_CRON', true);`
Then add this entry to your server's crontab:
`/15 * wget -q -O - >/dev/null 2>&1`
This fires every 15 minutes on the server clock, regardless of traffic.
On a managed WordPress host like Kinsta, WP Engine, or Pressable, you can skip both fixes. These platforms disable WP-Cron at the platform level and run a real cron automatically.
Native scheduling: the honest verdict
- Pros: Zero cost, no extra tools, built into every WordPress install
- Cons: WP-Cron is unreliable on low-traffic sites, no bulk scheduling UI, no editorial calendar view
Method 2: Auto-Publish via the WordPress REST API
Every no-code tool, plugin, and AI content platform that pushes posts to WordPress is doing one thing under the hood: calling the REST API. Knowing how it works gives you full control.
The REST API has shipped in WordPress core since version 4.7, and Application Passwords were merged into core in version 5.6. You don't need a third-party plugin to authenticate. This is the right path for teams running custom scripts, n8n/Make/Zapier workflows, or AI content pipelines that push content programmatically.
Difficulty: Intermediate to Advanced Estimated setup time: 15-30 minutes
Best for:
- Developers building custom publishing scripts
- No-code automation workflows (Zapier, Make, n8n)
- AI content pipelines that generate and publish at scale
Pros: Maximum flexibility, no plugin dependency, works with any language or tool that can send HTTP requests.
Cons: Requires basic familiarity with APIs and authentication. Not the right fit if you want a point-and-click setup.
Step 1: Create an Application Password
Before you send a single API request, WordPress needs to know who's asking. Application Passwords are the right tool for that job.
Here's how to create one:
- Log into your WordPress admin dashboard.
- Go to Users -> All Users and open the account you'll use for automation. Don't use your main admin account. Create a dedicated user with an Author or Editor role instead.
- Scroll to the bottom of the profile page until you see the Application Passwords section.
- Enter a descriptive name in the text field, something like Content Pipeline or Auto Publisher, so you know what it's for later.
- Click Add New Application Password.
- Copy the generated password immediately. WordPress shows it once and never again. Paste it somewhere safe.
If the Application Passwords section is missing, a security plugin is almost certainly the culprit. In Wordfence, go to All Options -> Brute Force Protection and uncheck Disable WordPress application passwords. WordPress's own documentation also flags must-use plugins and custom filters as common causes.
One mistake to avoid: the application name (Content Pipeline) is not your username. When authenticating API requests, always use the WordPress username paired with the generated password.
You don't need to write a single line of code to use the WordPress REST API. Zapier, Make.com, and n8n all connect to WordPress through the same endpoint and Application Password you set up above.
The general workflow is identical across all three tools:
- Add a WordPress connection using your site URL and Application Password.
- Set a trigger - a new row in Google Sheets, a completed Airtable record, an RSS item, or output from an AI writing tool.
- Map trigger data to WordPress post fields: title, content, status, and categories.
- Test with a draft post first before switching the status to `publish`.
Here's how the three tools compare:
| Tool | Setup difficulty | Free tier | Best for |
|---|
| Zapier | Easiest | 100 tasks/month, 5 Zaps (source) | Simple, single-step automations |
| Make.com | Moderate | 1,000 operations/month (source) | Multi-step workflows at lower cost |
| n8n | Steepest | Free when self-hosted | Developers who want full control |
Zapier is the fastest to get running: pick a trigger, pick an action, done. Make.com costs less at scale and handles branching logic well once you're past the initial learning curve. n8n is open-source and self-hostable, which means zero per-task fees, but you'll need to manage your own server.
One common mistake: mapping HTML content incorrectly. The WordPress REST API accepts raw HTML in the `content` field, but some automation tools escape the markup on the way through, turning `<p>` tags into `<p>` and breaking your post formatting. Always test with a single plain paragraph before sending a full article.
Method 3: WordPress Scheduling Plugins
Plugins sit in the sweet spot between native scheduling and the REST API. You get more control than WordPress's built-in scheduler, without touching a line of code.
This is the right approach for content managers and editorial teams who need a visual calendar, bulk scheduling, and protection against missed posts. Install, configure, and you're publishing on a reliable cadence in 10-15 minutes.
The standout option is SchedulePress, which offers a drag-and-drop editorial calendar, a missed-schedule handler (Pro), and auto-sharing to social platforms. Other solid choices include PublishPress Future and Editorial Calendar.
Pros: Visual workflow, no code, missed-schedule protection, multi-author support. Cons: Another plugin to maintain, advanced features often sit behind a paid tier.
The Best WordPress Auto-Publishing Plugins Compared
Not all scheduling plugins are built the same. Some are safety nets; others are full editorial operating systems. Here are four worth knowing.
SchedulePress (formerly WP Scheduled Posts) The most feature-rich option on this list. The free version gives you a drag-and-drop editorial calendar, multi-author management, and auto-sharing to Facebook, X, LinkedIn, Pinterest, Instagram, Threads, Bluesky, and more. The missed-schedule handler and auto-scheduler, which finds optimal posting times based on engagement patterns, are PRO only. Pro is available at a paid tier.
- Best for: Editorial teams managing multiple authors
- Pros: Visual calendar, social sharing built in, works with Gutenberg and Elementor
- Cons: Missed-schedule fix requires a paid upgrade
PublishPress Planner Think of it as a lightweight project management tool bolted onto WordPress. It adds custom post statuses (Draft, In Review, Scheduled), a content calendar, Kanban board, and team notifications. Slack integration and reminders come with Pro. The free version covers the core calendar and board.
- Best for: Teams with formal editorial approval workflows
- Pros: Full editorial workflow, multi-site support, clean UI
- Cons: More complexity than a solo blogger will ever need
CoSchedule CoSchedule is less a WordPress plugin and more a full marketing calendar that connects to WordPress. You manage blog posts, social content, and email campaigns from one unified view. The free tier is limited; Pro is available at a paid per-user monthly rate.
- Best for: Marketing teams who want blog, social, and email in one calendar
- Pros: Unified marketing calendar, strong integrations
- Cons: Expensive for small teams, overkill for basic scheduling
Missed Scheduled Posts Publisher by WPBeginner This one does exactly one thing: checks every 15 minutes and publishes any post that missed its scheduled time. No settings page, no bloat. Install it and forget it.
- Best for: Anyone using native WordPress scheduling who wants a safety net
- Pros: Free, zero configuration, lightweight
- Cons: No calendar, no workflow features
Summary comparison:
| Plugin | Free Tier | Best For | Missed Schedule Fix | Social Sharing |
|---|
| SchedulePress | Yes | Editorial teams | PRO only | Yes (free + PRO) |
| PublishPress Planner | Yes | Approval workflows | No | No |
| CoSchedule | Limited | Marketing teams | No | Yes |
| Missed Schedule Publisher | Yes (only) | Native scheduling users | Yes | No |
Step-by-Step: Setting Up SchedulePress for Auto-Publishing
SchedulePress turns WordPress's bare-bones scheduling into a proper editorial system. Here's how to get it running.
1. Install and activate the plugin Go to Plugins -> Add New, search for "SchedulePress", then install and activate it. The free version covers the calendar and manual scheduling. The Auto Scheduler requires SchedulePress PRO.
2. Configure your post types Navigate to SchedulePress -> Settings and confirm which post types you want to schedule: Posts, Pages, or any custom post types your theme registers.
3. Open the Schedule Calendar Click SchedulePress in the left menu. You'll land on a drag-and-drop monthly calendar showing every scheduled and draft post, color-coded by status. This is your publishing command center.
4. Schedule posts from the calendar Click any date cell and select Add New Post to create one on the spot, or drag an existing draft directly onto a date. No hunting through the post list.
5. Set date and time in the post editor Open any post. The standard Publish panel now includes SchedulePress controls. Set your date and time, then click Schedule. The post appears on the calendar immediately.
6. Turn on the Auto Scheduler (PRO) Go to SchedulePress -> Auto Scheduler. Set the days of the week and time windows you want posts to go live. The plugin distributes your queued drafts across those slots automatically. No manual date-picking required.
Expected outcome: Posts appear on the calendar with color-coded status indicators and publish at their assigned times without any further action from you.
Common mistake: Skipping social account setup before scheduling. If you want posts auto-shared on publish, connect your accounts first under SchedulePress -> Social Profiles. Otherwise the publish fires but the social share doesn't.
Method 4: AI Content Platforms That Write and Publish Automatically
The other three methods solve a scheduling problem. This one solves a content problem.
AI content platforms collapse the entire workflow, keyword research, writing, SEO and GEO optimization, and publishing, into a single automated pipeline. You're not scheduling content you've already written. The platform writes it, optimizes it, and pushes it live to WordPress on your behalf.
Under the hood, these platforms connect to WordPress via the REST API, exactly like Method 2. But all the technical complexity disappears behind a clean UI. No authentication headers, no JSON payloads, no cron jobs. Configure it once, and it runs on autopilot.
Who this is really for:
- Heads of SEO building topical authority at scale, who need 20 posts a month, not 2
- Content Managers keeping the editorial calendar full without burning out the team
- Founders doing content marketing without a dedicated writer or agency
51% of content professionals now use AI to accelerate production, according to eMarketer. The teams pulling ahead aren't just using AI to draft faster. They're using it to remove themselves from the process entirely.
Difficulty: Beginner. The platform handles the technical work.
Time to set up: 30-60 minutes to connect and configure. After that, the pipeline runs without you.
The next section walks through exactly how that connection works.
How AI Content Platforms Connect to WordPress
Under the hood, AI content platforms use the exact same authentication method covered in Method 2. They connect to WordPress via an Application Password, then push fully formatted content to the `/wp-json/wp/v2/posts` endpoint. The difference is what they send.
A basic REST API call pushes a title and a body. A good AI content platform pushes an entire, publication-ready post:
- Clean HTML structure with proper H2/H3 heading hierarchy, not a wall of unstyled text
- Featured images uploaded natively via the `/wp-json/wp/v2/media` endpoint, so the image lives in your Media Library with its attachment ID assigned to `featured_media`, not a fragile external URL that breaks when the source moves
- SEO metadata written directly to plugin custom fields, including the meta title and description for Yoast or Rank Math
- Internal links pulled from a vector map of your existing content, with anchor text matched to target keywords
- Categories and tags assigned automatically based on content topic
- Schema markup (FAQ, HowTo, Article) injected as JSON-LD
The platform then sets `status` to `future` with a scheduled date, or `publish` for immediate delivery. The post appears in WordPress exactly as if a human had built it in the block editor.
Content Pipeline by Content Pipeline takes this further. Specialist AI agents handle the full workflow: brand-aware writing, per-article keyword research, live SERP analysis, on-page SEO, GEO optimization, and schema. When a piece is ready, one-click publishing pushes it straight to WordPress. Turn on Auto Pilot and the platform carries projects through their phases and publishes on schedule, with no copy-paste and no manual formatting.
Step-by-Step: Connecting an AI Content Platform to WordPress
Most AI content platforms connect to WordPress the same way: via the REST API and an Application Password. Here's how it works using Content Pipeline as the example, though the steps apply to any similar platform.
Step 1: Create an Application Password in WordPress. Go to Users → Profile, scroll to Application Passwords, give it a descriptive name (e.g., "Content Pipeline"), and click Add New. Copy the password immediately. It won't appear again. Full details are in the WordPress developer documentation.
Step 2: Connect your WordPress site in the platform. In Content Pipeline, go to Settings → Publishing Connections. Enter your WordPress site URL, your automation username, and the Application Password you just copied. Hit Test Connection. The platform confirms it can read and write posts before you proceed.
Step 3: Set your publishing schedule. In the content calendar or Auto Pilot settings, choose which days to publish, what time, and how many posts per week.
Step 4: Configure brand settings. Define your tone of voice, target audience personas, topic clusters, and internal linking rules. Content Pipeline uses these to keep every auto-published post on-brand, not just on schedule.
Step 5: Enable Auto Pilot. Once Auto Pilot is on, the platform generates content according to your plan and publishes directly to WordPress on the schedule you set. Posts arrive fully formatted, with SEO metadata, featured images, and internal links. No copy-paste required.
The one mistake to avoid: don't walk away after flipping the switch. Review the first 2-3 auto-published posts manually. Check formatting, brand voice, and metadata. Once that first batch looks right, you can let the pipeline run fully unattended.
Which Method Should You Use? A Decision Framework
Four methods, one right answer for your situation. Here's how to pick it.
If you publish 1-4 posts per month and write everything yourself, use native WordPress scheduling. It's free, already built in, and more than enough. Just install the Missed Scheduled Posts Publisher plugin by WPBeginner as a safety net against WP-Cron failures.
If you run a content team with multiple authors and need an editorial calendar with approval workflows, use a scheduling plugin like SchedulePress or PublishPress Planner. Both give you a drag-and-drop calendar, multi-author controls, and missed-schedule recovery in one dashboard.
If you're building a custom content pipeline, connecting an external CMS, or automating via Zapier, Make, or n8n, use the REST API directly. It's the most flexible option and puts you in full control of the publish trigger.
If you want to auto-publish blog posts to WordPress at scale (8+ posts per month) without growing the team, and you need content that is planned, written, SEO-optimized, and published automatically, use an AI content platform with native WordPress publishing. It's the only method where content creation and publishing happen in the same workflow.
---
Summary Comparison Table
| Method | Technical Skill | Cost | Best Publishing Volume | Missed Schedule Risk | Content Creation Included |
|---|
| Native WordPress Scheduling | None | Free | 1-4 posts/month | Medium (WP-Cron dependent) | No |
| Scheduling Plugin (SchedulePress, PublishPress) | Low | Free or paid tier | 4-20 posts/month | Low (built-in recovery) | No |
| REST API + Automation (Zapier, Make, n8n) | Medium-High | Varies by tool | Unlimited | Low (server-controlled) | No |
| AI Content Platform | None | Subscription | 8+ posts/month | Very Low (platform-managed) | Yes |
The table above is the fastest way to gut-check your choice. If you're still unsure, start with native scheduling and upgrade as your publishing volume grows.
Troubleshooting: Common Auto-Publishing Problems and Fixes
Something published at the wrong time. Or didn't publish at all. Here are the five failure modes you're most likely to hit, and exactly how to fix them.
1. "Missed schedule" error in the post list
This is the most common complaint. WordPress uses WP-Cron to fire scheduled tasks, but WP-Cron only runs when someone visits your site. On low-traffic sites, no visit means no trigger, and your post sits unpublished.
Two fixes:
- Install the Missed Scheduled Post Publisher plugin for a no-code solution.
- For a permanent fix, disable WP-Cron by adding `define('DISABLE_WP_CRON', true);` to `wp-config.php`, then set up a real server cron job that hits `wp-cron.php` every 15 minutes via crontab. As DreamHost explains, WP-Cron's reliance on site visits is the root cause of most missed schedule errors.
2. REST API returns 401 Unauthorized
Three culprits cause almost every 401:
- You used the application name instead of your actual WordPress username. Go to Users → All Users and confirm the exact login name.
- You stripped the spaces from the Application Password when copying it. The spaces are part of the password. Re-copy it exactly as shown.
- A security plugin (Wordfence, iThemes Security) is blocking REST API access. Check its settings and whitelist your IP or the REST API endpoint.
3. Posts publish at the wrong time
Timezone mismatch. Your site's timezone (set under Settings → General → Timezone) and the timestamp your automation tool sends are out of sync. When sending a date via the REST API, either use the site's local time in the `date` field, or switch to `date_gmt` and send UTC. One or the other, not both.
4. Featured image not appearing
The `featured_media` field requires a WordPress media attachment ID, not an image URL. First POST the image to `/wp-json/wp/v2/media`, grab the numeric `id` from the response, then include that ID as `featured_media` in your post request. Skipping the upload step is the mistake almost everyone makes once.
5. Content formatting is broken (HTML escaped or stripped)
Zapier and Make sometimes escape HTML characters before passing content to WordPress, turning `<strong>` into `<strong>`. Make sure the `content` field is sent as raw HTML. Test with a simple paragraph containing a `<strong>` tag first. If it renders correctly, your pipeline is clean.
How to Verify Your Auto-Publishing Setup Is Working
Don't trust your pipeline until you've tested it. One missed publish on a product launch or campaign post is all it takes to lose confidence in the whole setup. Run this checklist before you let any method go live unsupervised.
Step 1: Schedule a test post 5 minutes out. Use whichever method you've configured. Give it a throwaway title like "[TEST] Delete Me" and set the publish time 5 minutes from now.
Step 2: Watch the status change. Go to Posts → All Posts. When the scheduled time passes, the post should move from Scheduled to Published. If it stays stuck on Scheduled, you've hit the WP-Cron problem covered earlier.
Step 3: Visit the live URL. Open the post's public permalink. Confirm the page loads, headings render correctly, images display, and the formatting isn't broken. Don't skip this. A post can show as "Published" in the dashboard while the front end throws a 404.
Step 4: Check your method-specific signals.
- REST API: Look at the response body. A successful create returns HTTP 201 with `"status": "publish"` or `"status": "future"`, as confirmed in the WordPress REST API reference. A 4xx error means your authentication or endpoint is wrong.
- Plugin: Open the plugin's log or dashboard. SchedulePress and similar tools record each publish event with a timestamp.
- AI content platform: Check the post in WordPress for correct title and slug, formatted body with proper heading hierarchy, featured image, SEO meta title and description in Yoast or Rank Math, correct categories and tags, and internal links pointing to real pages.
Step 5: Check mobile rendering. Open the post on a phone. Formatting issues invisible on desktop often surface on smaller screens.
Only once every item on this list passes should you switch the pipeline to publish without human review.
Next Steps: Building a Sustainable Auto-Publishing Workflow
Getting the technical setup right is only half the job. The other half is building a workflow that holds up over months, not just the first week after you configure it.
Consistency beats volume. HubSpot's blogging frequency research is clear: a reliable cadence of 2 posts per week outperforms sporadic bursts of 10 posts followed by silence. Businesses that blog consistently see 13x more positive ROI than irregular publishers. Automation makes consistency achievable without burning out your team.
Build a content buffer. Always keep 2-4 posts scheduled ahead of today's date. A missed deadline, a sick writer, or a plugin conflict won't create a visible gap if you have a cushion. Think of it as your publishing emergency fund.
Audit auto-published content monthly. Automation doesn't mean set-and-forget. Pull your top posts into Google Search Console once a month and check for ranking drops, outdated facts, or brand voice drift. AI-generated content needs a human eye on accuracy and tone.
Combine methods where it makes sense. There's no rule that says you pick one approach and stick to it. A practical stack might look like this:
- An AI content platform generates and schedules posts to WordPress
- SchedulePress handles social auto-posting the moment each post goes live
- Google Search Console flags underperforming posts for a quarterly refresh
For teams using AI content platforms: plan your topic clusters first. Configure pillar pages and cluster topics before you start scheduling posts. Automated content that builds topical authority systematically will outrank a pile of disconnected articles every time.
If you want the entire workflow handled in one place, planning, writing, SEO optimization, and direct WordPress publishing, that's exactly what Content Pipeline is built for. It connects to your WordPress site, generates on-brand content around your topic clusters, and publishes on a schedule you control. No plugin juggling, no manual uploads.
Conclusion
Pick the method that matches your team's technical comfort and publishing volume. Native scheduling works for simple setups. The REST API suits developers who want full control. Plugins like SchedulePress add editorial structure without custom code. And if you want content planned, written, and published without manual steps, an AI platform handles the entire pipeline.
Want Posts Written and Published Automatically?
Content Pipeline by Content Pipeline plans, writes, SEO-optimizes, and publishes on-brand blog posts straight to your WordPress site on autopilot - no copy-paste, no manual scheduling, no growing the team.
See Content Pipeline in Action
See the Content Pipeline platform, explore SEO and GEO, or compare us in AirOps alternatives.
Sources
- How Often Should You (or Your Company) Blog? (New Data)
- Changelog, REST API Handbook | Developer.WordPress.org
- Version 4.7, Documentation, WordPress.org
- WordPress 2.1 Ella, WordPress News
- WP-Cron: How WordPress Scheduling Works (and How to Fix It)
- Schedule a Post - Make WordPress Support
- SchedulePress (Auto Post & Publish, Auto Social Share, Schedule Posts with Editorial Calendar & Missed Schedule Post Publisher) WordPress plugin | WordPress.o
- Cron, Plugin Handbook | Developer.WordPress.org
- Missed Scheduled Posts Publisher by WPBeginner, WordPress plugin | WordPress.org
- Changeset 49109, WordPress Trac
- Application Passwords, Advanced Administration Handbook ...
- Posts, REST API Handbook | Developer.WordPress.org
- Zapier WordPress Integration: Connect or Replace It
- Zapier Vs Make.com 2026: I Tested Both And Got Surprised - Mythemetool - MyThemeTool
- WP Scheduled Posts (SchedulePress) - Best Editorial Calendar
- PublishPress Planner (Editorial Calendar, Marketing Content, Kanban Board) WordPress plugin | WordPress.org
- PublishPress Planner manages and schedules WordPress content
- CoSchedule Pricing: Social Media Management Plans
- Content Pipeline: AI content that sounds like your brand
- How to Fix the Missed Scheduled Post Error in WordPress
- 30 Content Marketing ROI Statistics (2026), GTM 80/20
 By Elad Hefetz · CEO at Airfleet ·